🐉 Dragon Spawn
In this little example, we’re going to register our players for an event that fires when a Dragon spawns!
1. 📩 Create an Event
Section titled “1. 📩 Create an Event”Right click in your content browser and navigate to AES -> Event.
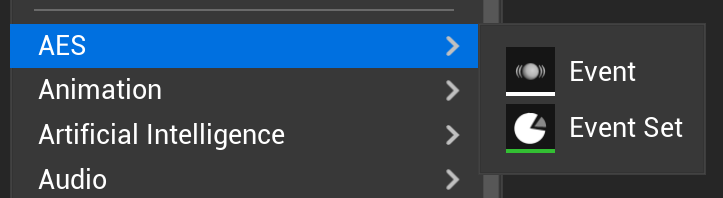
This will generate a custom AES Event asset.
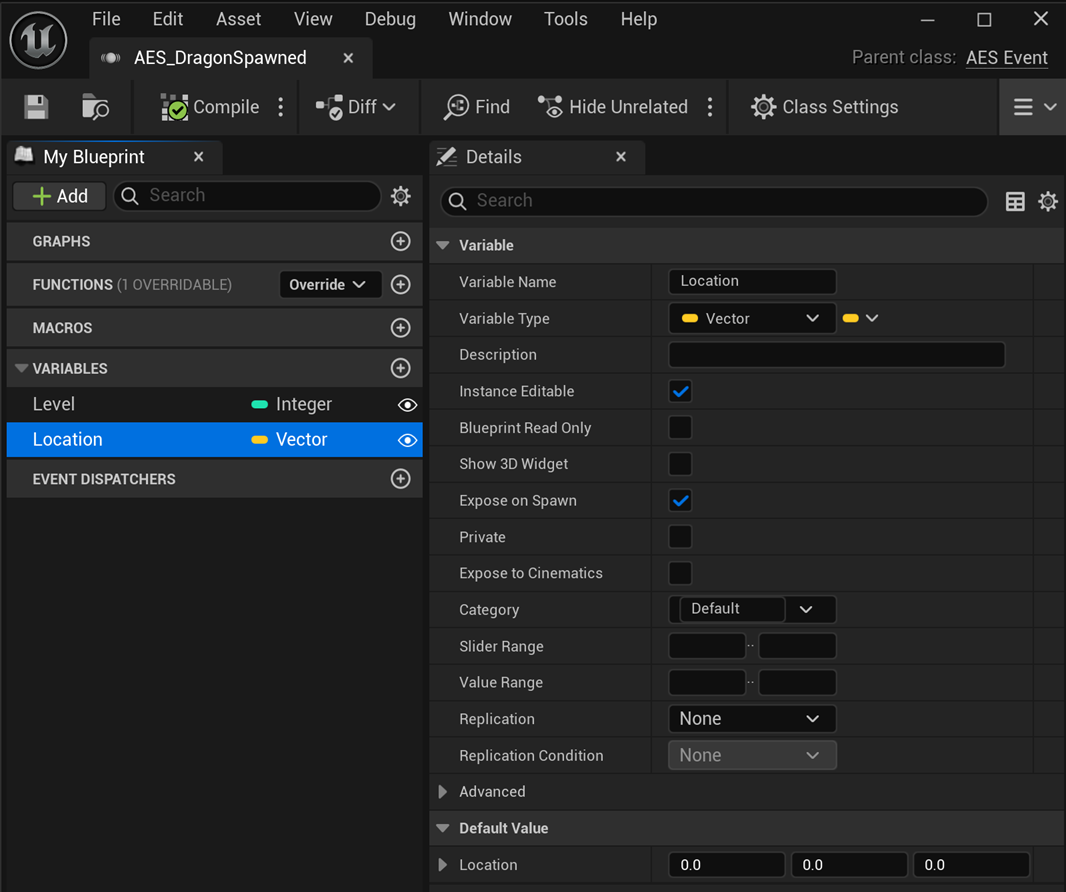
2. 🗳️ Add Payload Properties
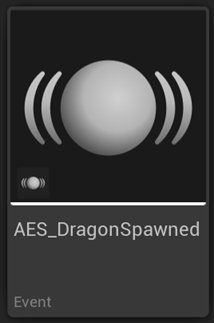
Section titled “2. 🗳️ Add Payload Properties”Open the AES_DragonSpawned event and add any properties as you normally would. In our example we’re going to add Level and Location.
We make sure any properties that we want to be exposed when this event is generated are set to Instance Editable and Expose on Spawn.
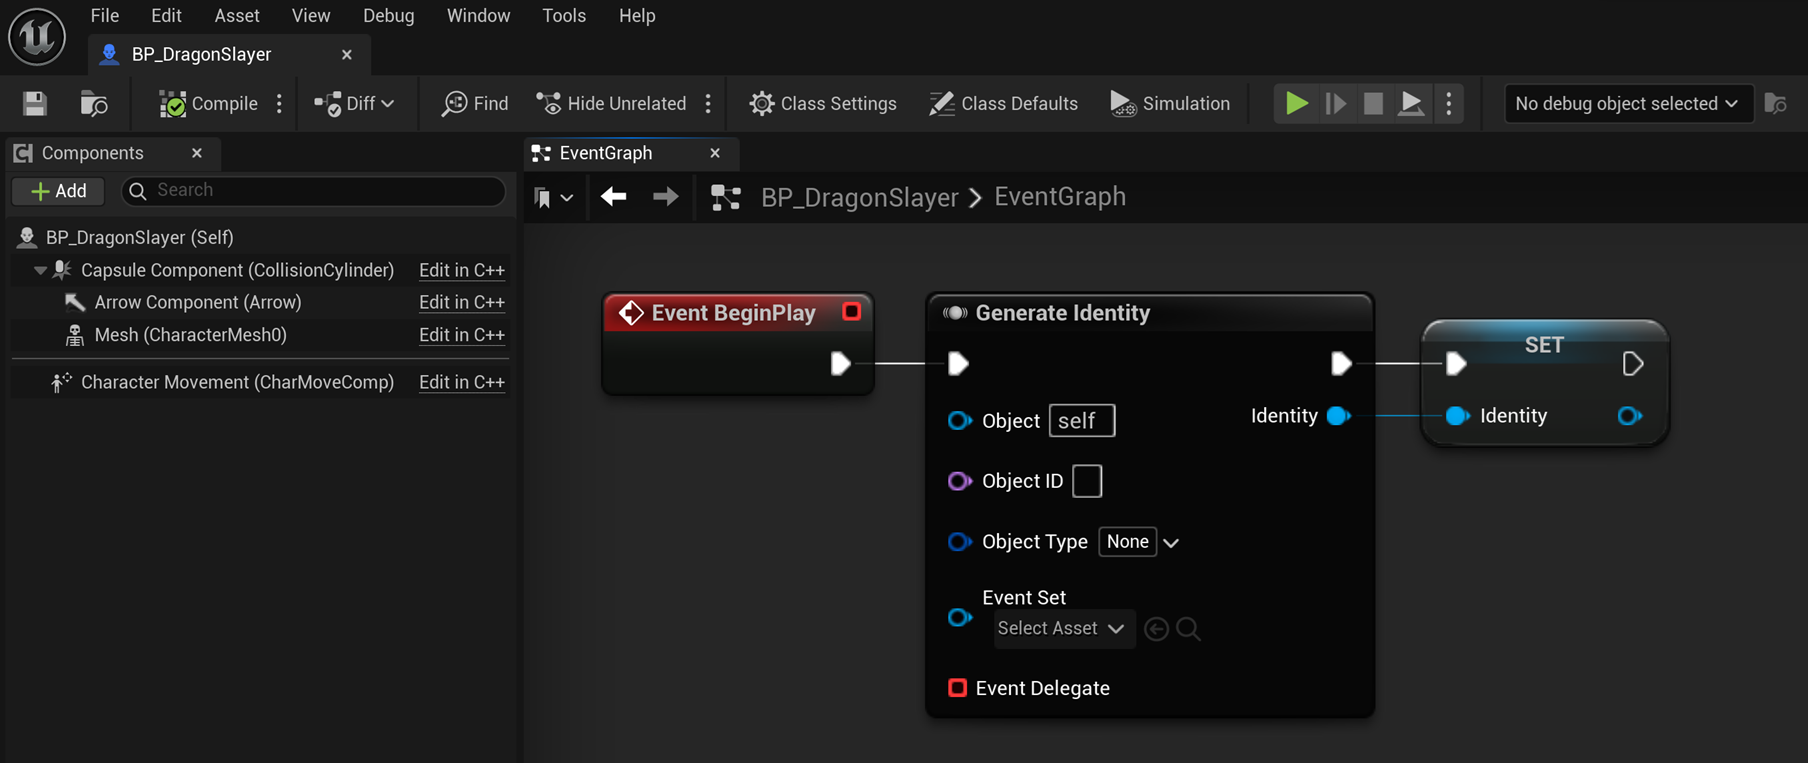
3. 🪪 Generate an Identity for Players
Section titled “3. 🪪 Generate an Identity for Players”Generate a unique Identity for any actor, component, system or object that may send or receive events. In our case, we’re generating an Identity for our Dragon Slayer player pawn!
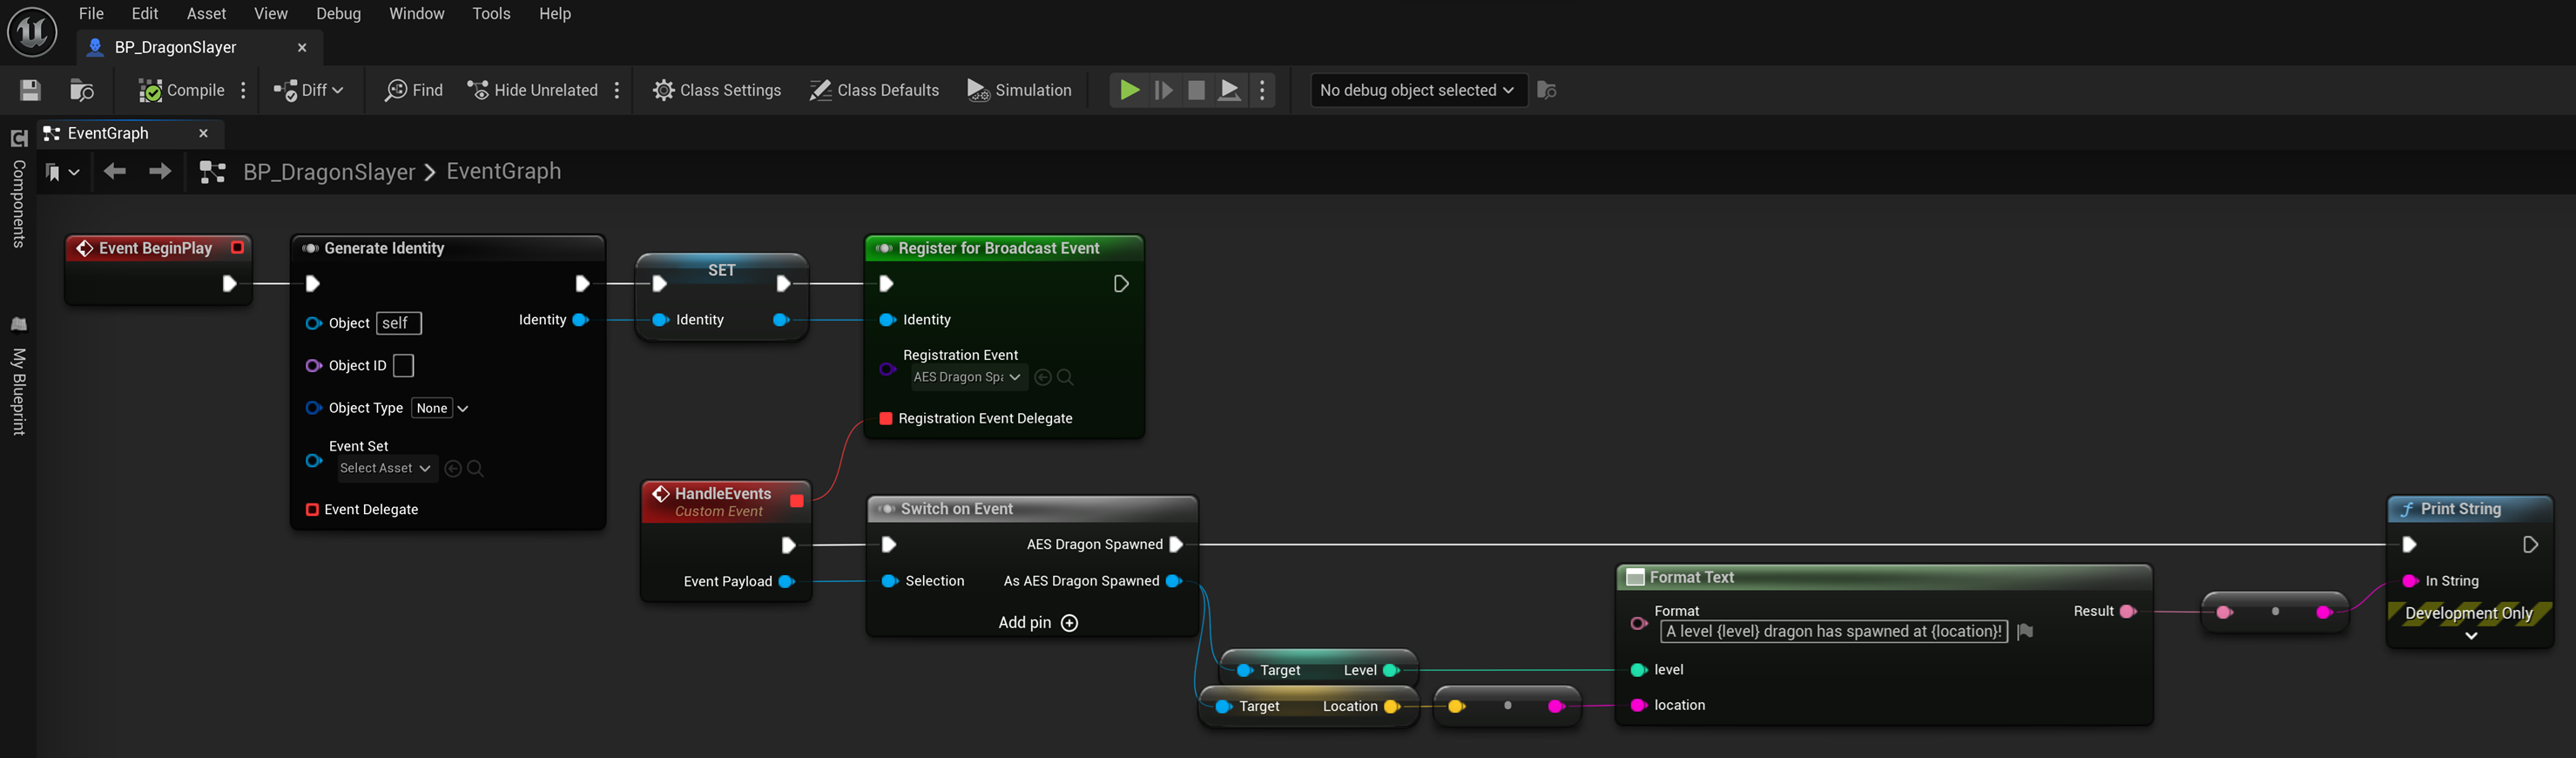
4. ✒ Register for the Broadcast Event
Section titled “4. ✒ Register for the Broadcast Event”Now that we’ve generated an Identity, we can use it to talk to the Event Manager.
Here we register for a Broadcast event by passing in a Registration that consists of the AES Event that we want to listen for and the delegate we want to call when the event happens. In our case the event is AES_DragonSpawned and the callback is our OnDragonSpawned custom event.
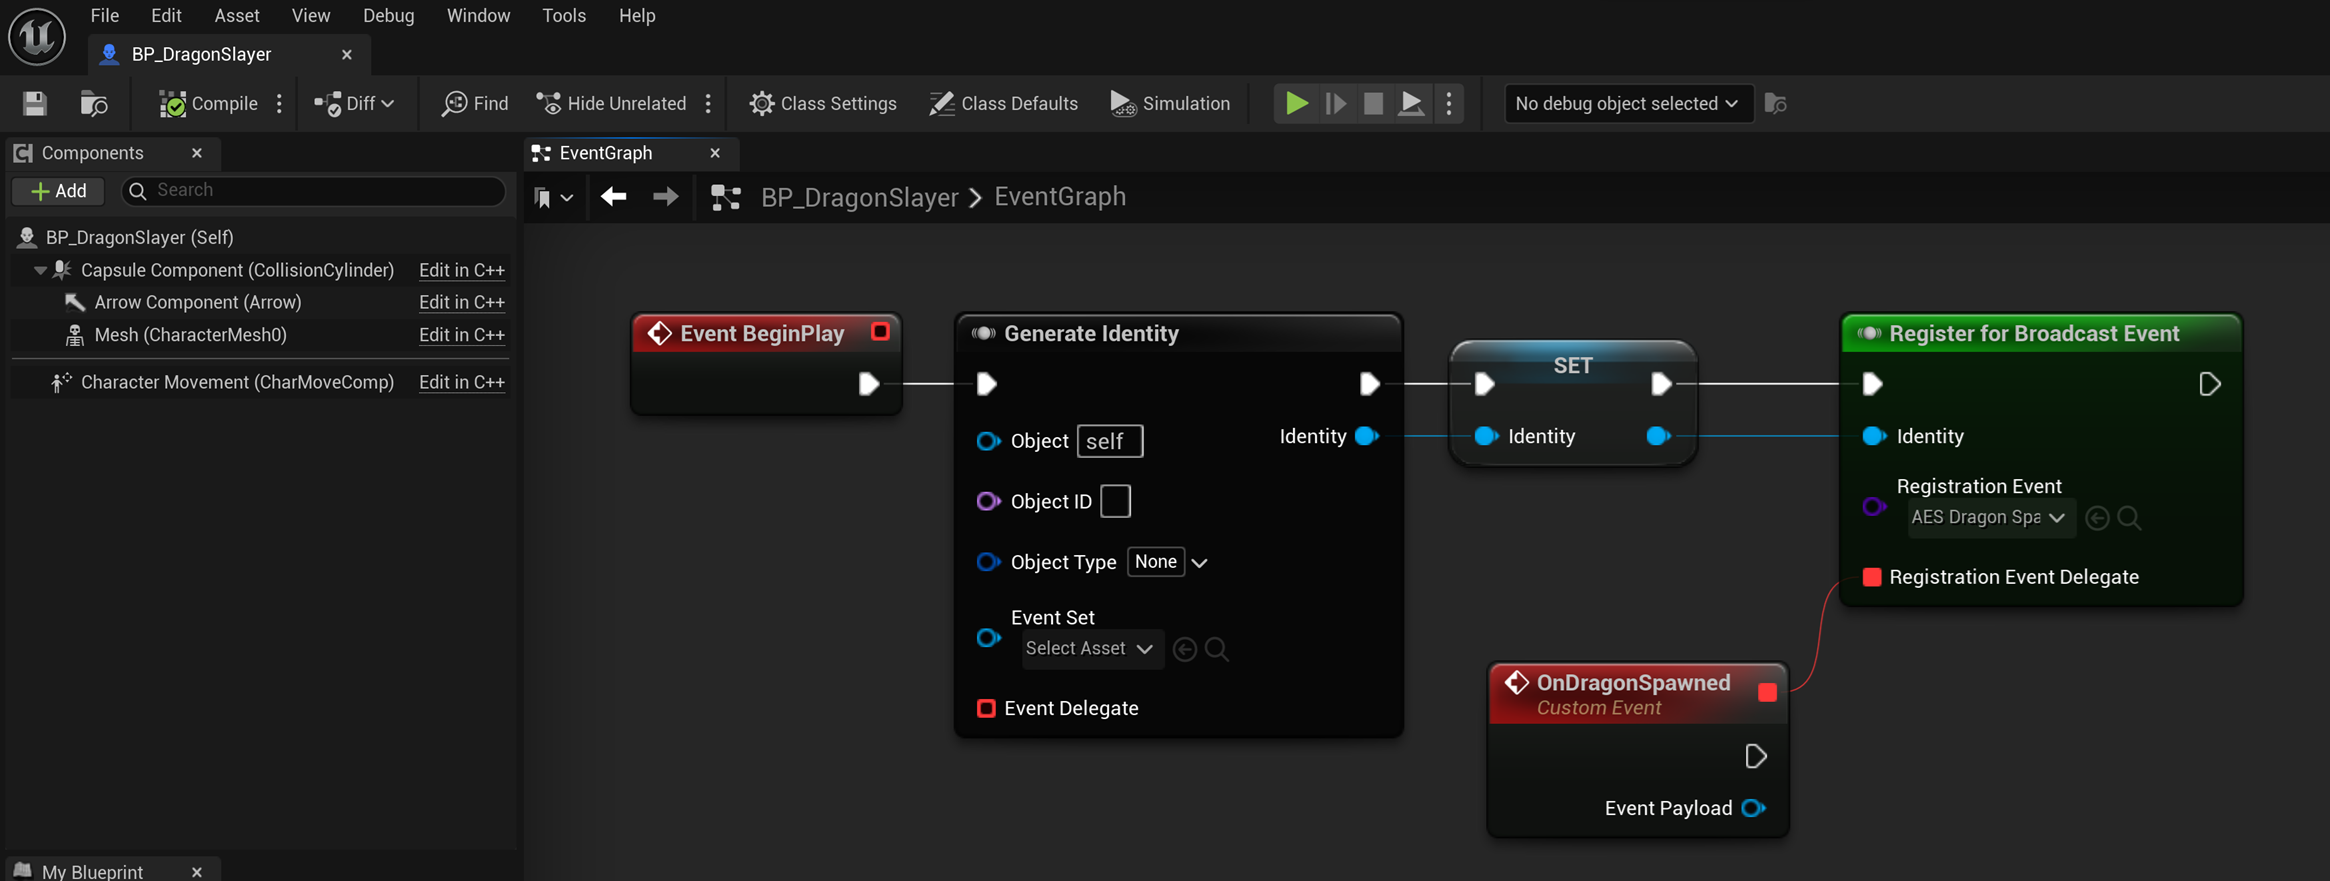
When the event is generated and this delegate gets called, we get a generic AES Event Payload. In order for us to get data from a specific event type, we can use 1 of 2 methods:
1) Cast Method (Single-Use Delegate)
Section titled “1) Cast Method (Single-Use Delegate)”If this delegate (our On Dragon Spawned custom event) is only ever going to be used for this specific AES_DragonSpawned event, we can use a simple cast to get the data we need.

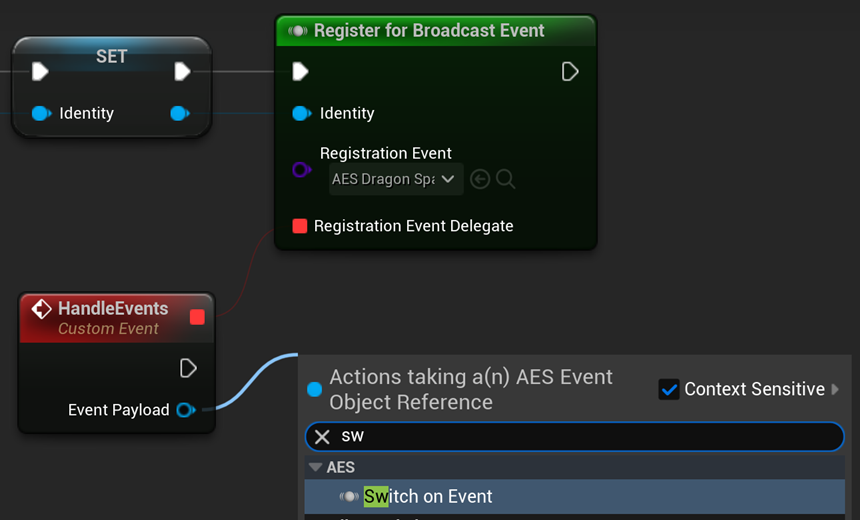
2) Switch on Event Method (Multi-Use Delegate)
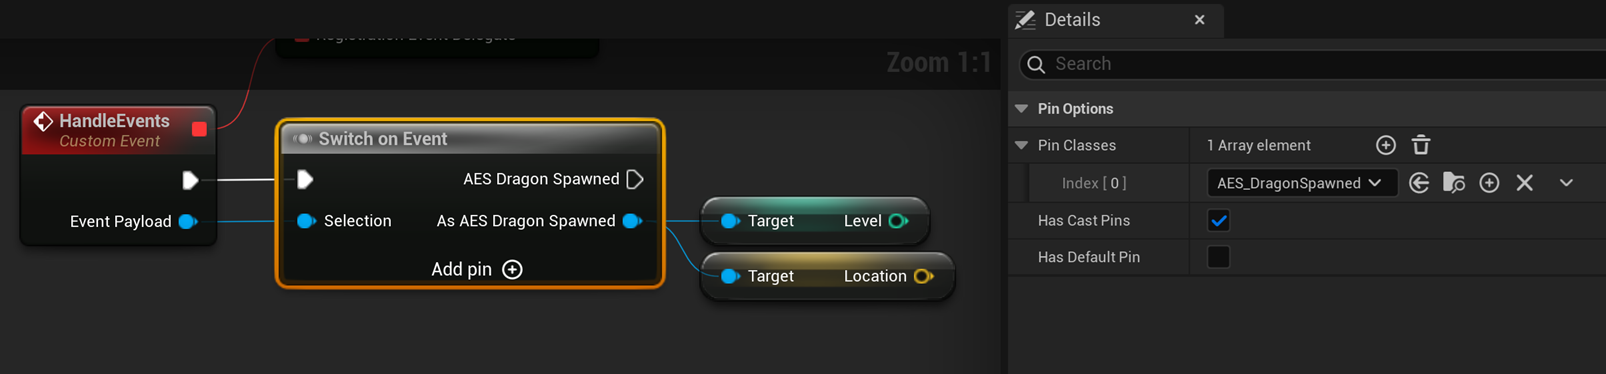
Section titled “2) Switch on Event Method (Multi-Use Delegate)”If we want this delegate to handle multiple events, we should rename it to something more generic like Handle Events and then we can use our custom Switch on Event node to get our data.
Selecting the Switch on Event node will show some settings in the detail panel. We can hide the Default pin in this case and add our AES_DragonSpawned event. We keep the Has Cast Pins because we want it to auto-cast our event type so we can easily grab the data from our AES_DragonSpawned event.
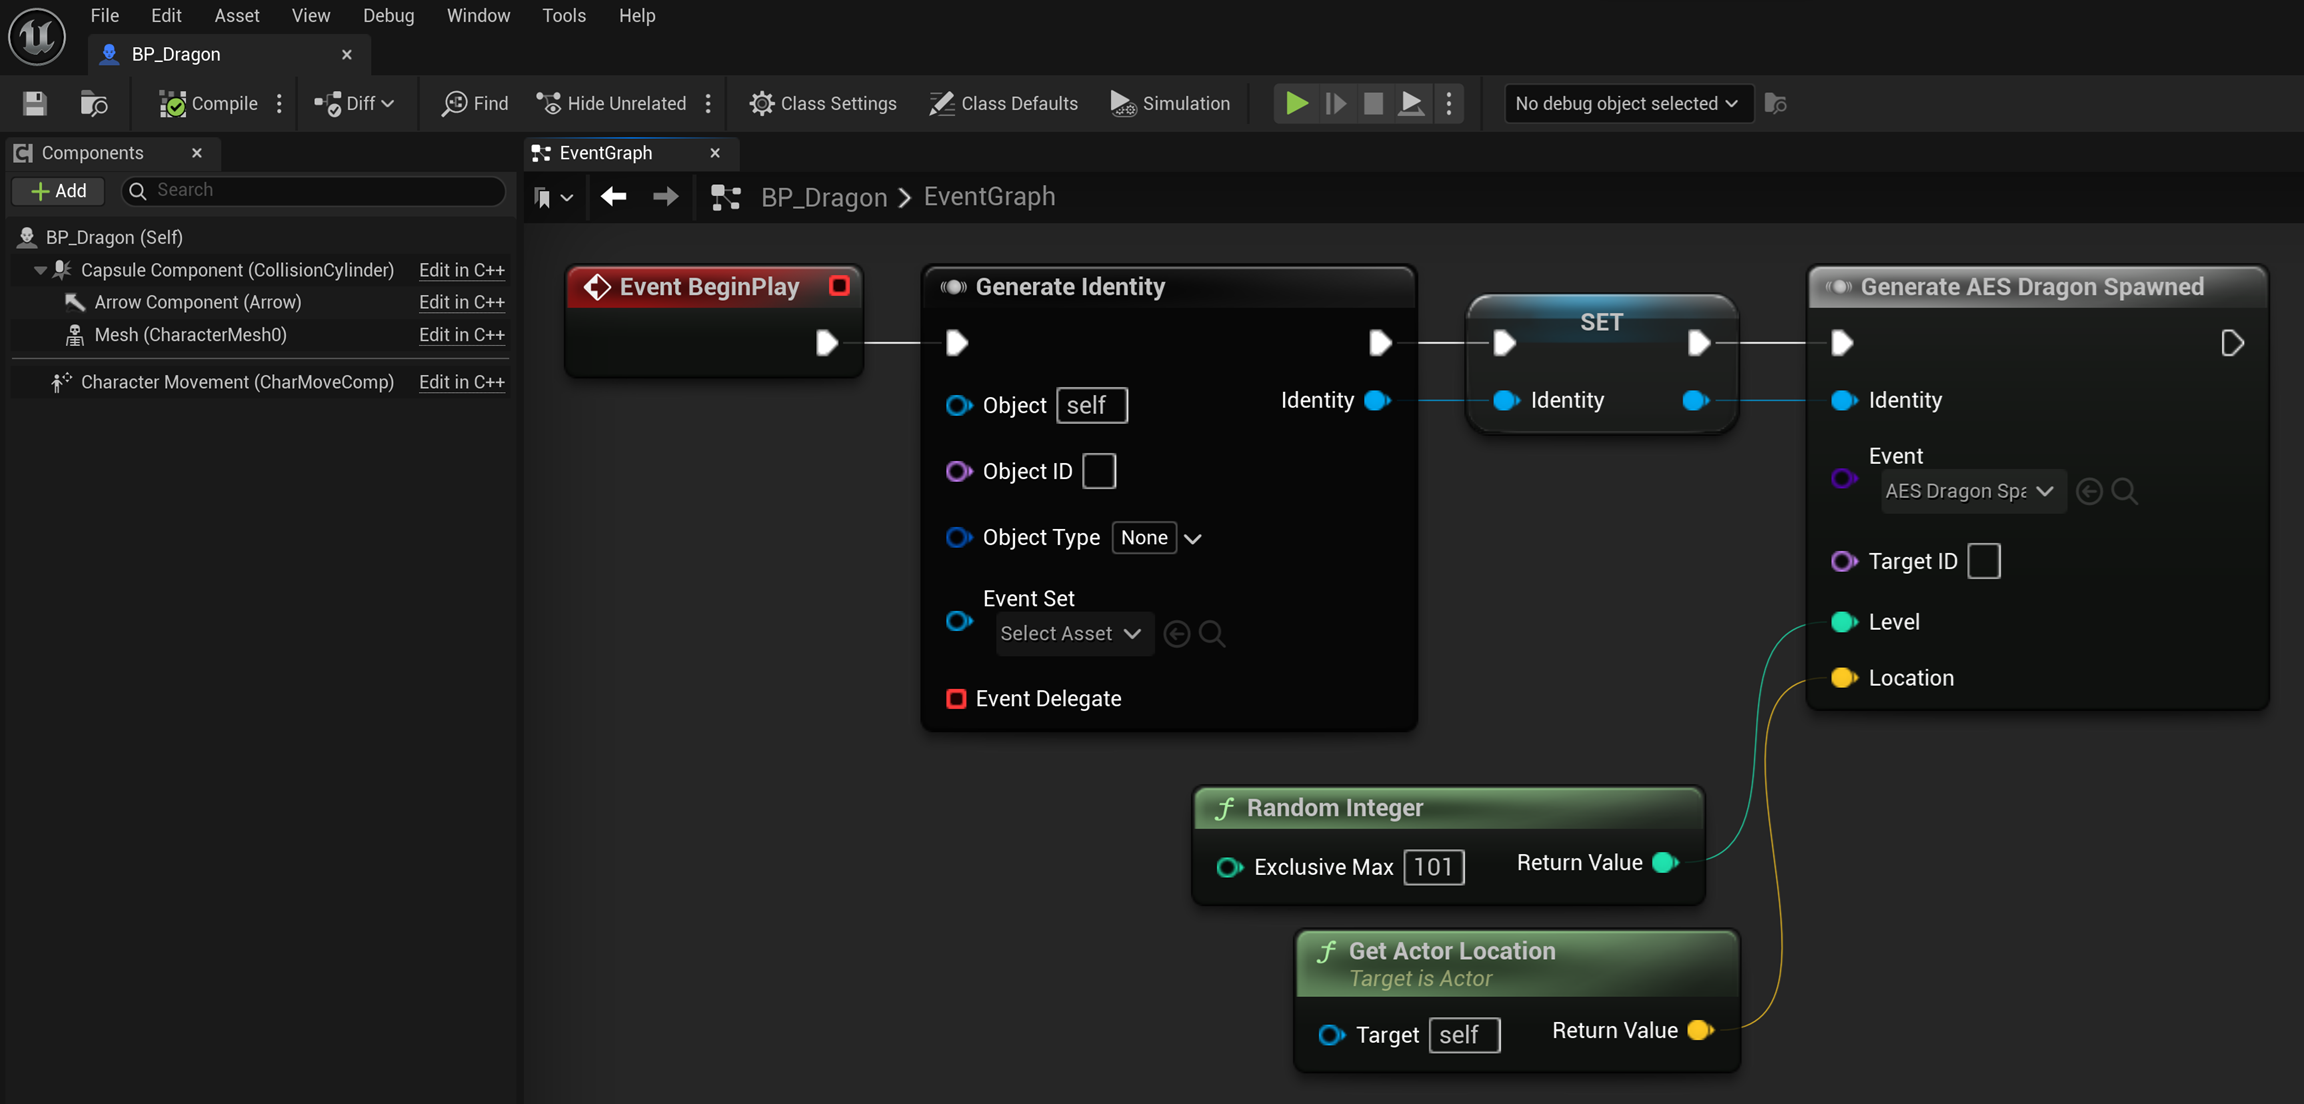
5. 📨 Generate the Event
Section titled “5. 📨 Generate the Event”In our Dragon class, on Begin Play we generate an Identity for the dragon and then we call Generate Event.
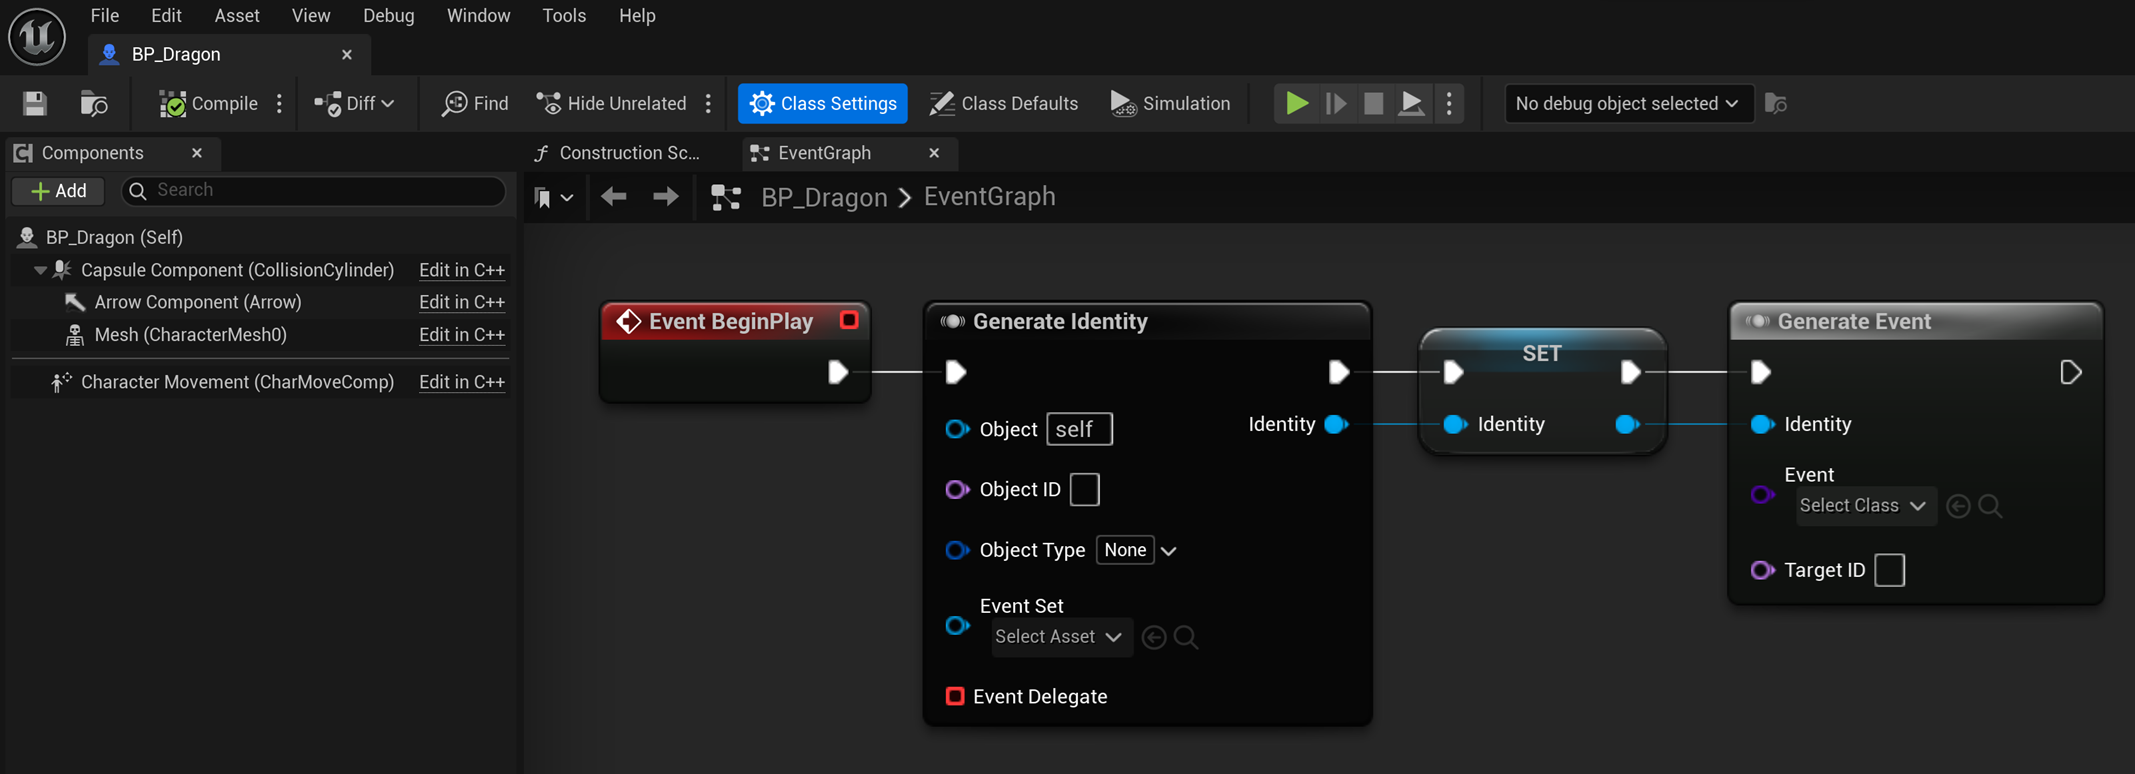
As soon as the AES_DragonSpawned event is selected, any Instance Editable and Expose on Spawn properties will automatically generate pins allowing us to set the values before the event is broadcasted.
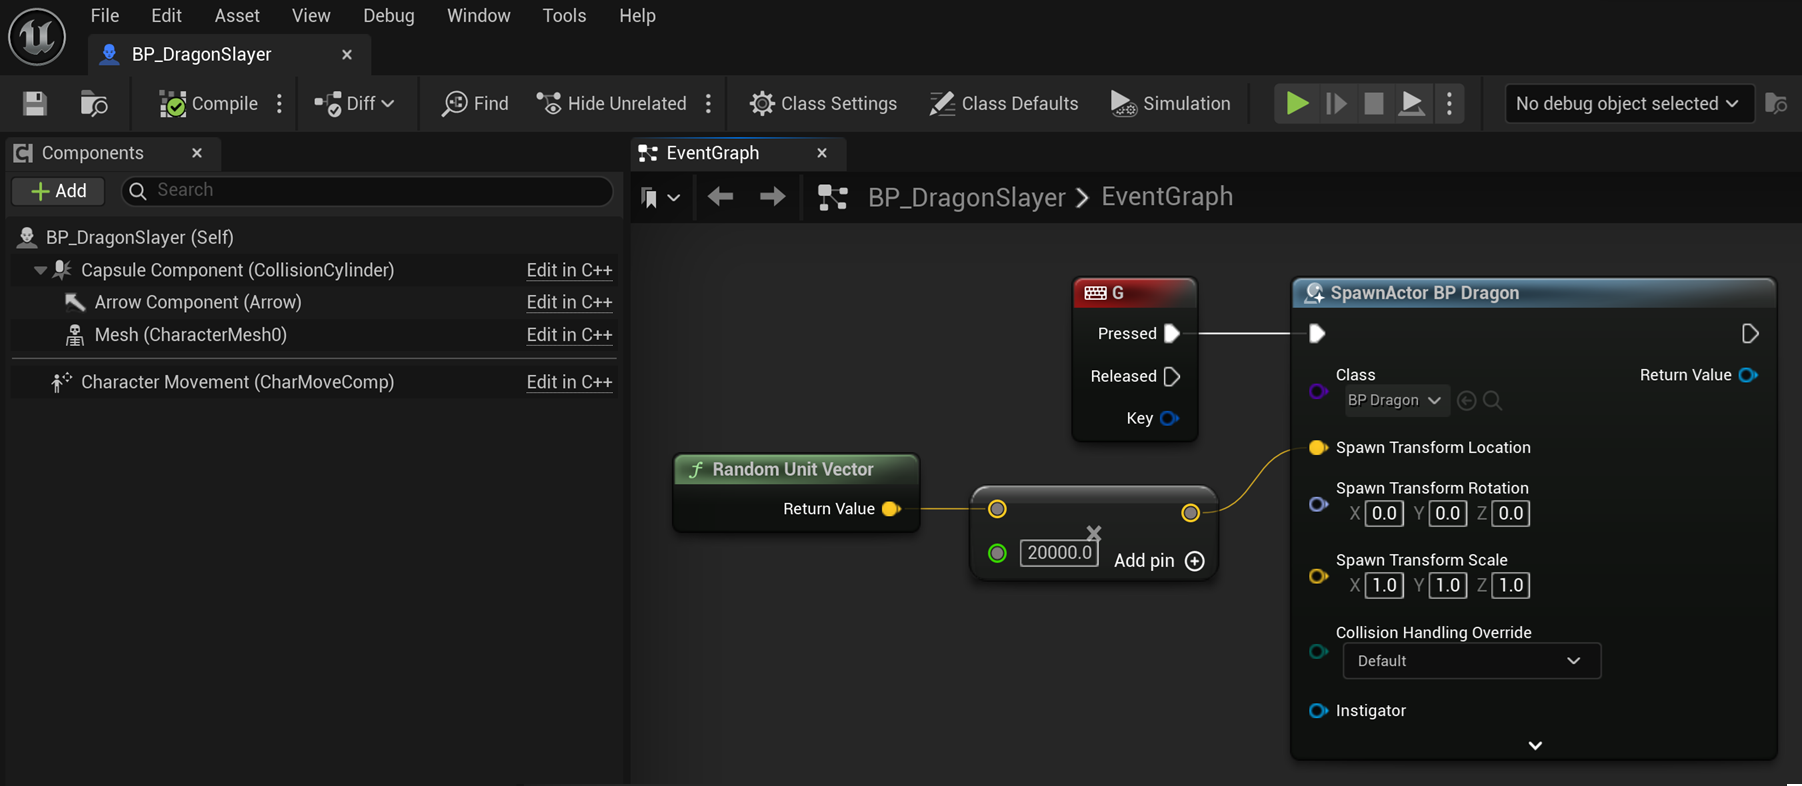
6. 🐲 Spawn the Dragon!
Section titled “6. 🐲 Spawn the Dragon!”This spawning would obviously be handled by whatever system you have in place that’s responsible for spawning the dragon.
For demo purposes, in our BP_DragonSlayer character we add a simple Print String so we can see our event when it gets called.
Since we’re playing as a Server, we can just hardcode a keypress to spawn a BP_Dragon on demand.
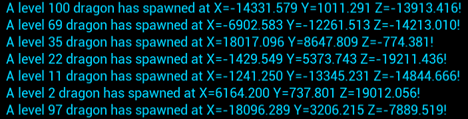
Now when we press G we’ll see our BP_Dragon is being spawned and on Begin Play since its generating a random level our AES_DragonSpawned event gets called with the Level and Location payload that we passed in earlier and our BP_DragonSlayer character is hearing the event and seeing the data correctly!
Now we say GG in the chat as all of these dragons head to the nearest town for a good ol’ barbecue! 🥩🔥